The Magic Of Softies

Something new for my etsy store.
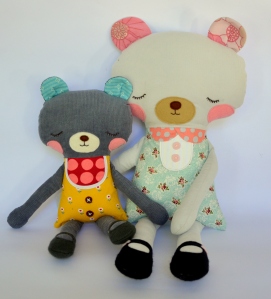
DSC_0016-001For the last couple of months I have really lost my sewjo. That was until I stumbled upon this gorgeous pattern by Retro Mumma. I am in love with this sleepy bear and all the magic that comes with Softies. Not only are they cuddly, they can be loving companions for any boy or girl. I watch my daughter still play and talk with her softies and it warms my heart.

DSC_0013-001

Along with bears I have also made a few Geometric Clutches, cute, stylish and super useful. Got to love useful things. This is the first pattern that I published and have now sold to all corners of the world. From Dubai to Indonesia, America to France. The Mellebug Wristlet Clutch Pattern is spreading cuteness everywhere.

DSC_0035

All of these lovely wares are now available in my etsy store:

www.etsy.com/shop/mellebug

Head on over for a look see. Enjoy the magic of Softies.


LV

BEC xx

Gluten Free Whole Orange Cake

This cake is so spectacular that it doesn’t last long in my house for a photo to be taken. I will endeavour to get one eventually but for now blogging the recipe allows me to find it later.

Can you tell I am still
On my orange bender? Next I wouldn’t mind some crepe suzette.

I have always wanted to make a whole orange cake but the budget didn’t like the fact I had to use 3 odd cups of almond meal and 6 eggs. So as usual I just experimented and out came the most yummy, moist cake that my kids love. Bonus!!

1 large orange
3 eggs
1/2 c Panela sugar (or alternative)
1/3 c melted coconut oil
1 tbl GF baking powder
1 c almond meal
1 c GF self raising flour blend (shop bought)

In a small saucepan place in orange and cover with water to the top. Bring to boil and simmer for two hours. This will take away the bitterness of the rind. Leave to cool. I did this part the day before.

Preheat oven, 180c degrees.
Remove the orange from the water and blitz until smooth. Discard water.
Now in another bowl whisk ( I just used a hand whisk) together the eggs and sugar until combined. Add in the orange purée, oil and baking powder. Combine.
Stir in the almond meal and flour. Pour into a 20cm round cake pan and cook for 35-45 mins or until firm.

Gluten Free Jaffa Biscuit

It’s orange season here in Australia and our orange tree is showering us with its first fruit.

20140525-105721.jpg

Last week I made GF carrot and orange cake, still tweaking the recipe but I will share soon, and today I just made Jaffa cookies. The combination of chocolate and orange is just amazing, just deserving to be turned into a cookie.

They have a crunchy shell with a soft centre, just like the lolly. I have added flaxseed/linseed meal for fibre and almond meal for protein. I always try to make anything with a little bit of goodness.

Okay, recipe.

125g softened butter
1/3 c Panela sugar, or brown
2 tsp orange zest

Cream all of these together until light in colour and fluffy in texture.

Add
1 egg
1tsp baking powder GF

Combine.

1 c GF plain flour blend
1/2 c almond meal
1/3c linseed meal
1/3 c dark choc chips.

Mix in flours first and then choc chips. Refrigerate until firm.

Preheat oven. 180c degrees.
Roll dough into balls.

20140525-110732.jpg

Press down slightly and bake for 20 mins or until browned.

20140525-110857.jpg

Enjoy!!

Gluten Free Chocolate Self Saucing Pudding Recipe: My Way

I found a great recipe for gluten free chocolate pudding on taste.com.au, tweaked it a little and it turned out amazeballs!!!

Here is my version minus a picture as there is really no nice way to photograph it. It’s poo on a plate. No amount of fluffy bits will make it look great. Just take my word for it that it is delicious and even my anti gluten free niece was none the wiser. She raved about how yummy it was. You should have seen her face drop when I told her, bahahaha, victory.

Now, the recipe:
– 50 g melted butter
– 1 c gf self raising flour ( I use ‘Free From Gluten’)
– 1/2 c castor sugar
– 1/2 c almond meal
– 1 Tbl gf baking powder
– 2 Tbl cocoa powder
– 1 c milk
– 1/2 c dark choc chips
Sauce
– 1 and 1/4 c of boiling water
– 30 g chopped butter
– 1/2 c packed brown sugar ( I would use a little less next time)
– 1/3 c cocoa powder

Preheat oven 180 degree C.
I do this all in one ceramic pot with lid, about 1L (or use alfoil).
Melt butter in microwave. Stir in the flour, meal, order, cocoa, sugar and milk. Whisk until all combined and smooth. Stir in choc chips.
In another jug/bowl, combine all the sauce ingredients, stir until all combined and butter melted ( butter gives a richer sauce). Pour slowly over the cake part.
With lid on, place into oven for 30-35mins or until firm to touch.

Serve warm with cream or another sweet touch of ice cream.

Yum yum pigs bum.

Enjoy!!

Crazy about crochet

I think I have found my latest craft love: CROCHET!!

I tried learning crochet a couple of years ago now and found it terribly difficult and my hands would cramp up something shocking so I threw it in the corner (yes, my frustration got the better of me) and vowed one day I will conquor it. Fast forward a couple of years and I just wanted to have a go at making a granny square blanket. I retrained my fingers to choose another more comfortable position and just crocheted and crocheted. I ended up completing my over the knee throw blanket (sorry I neglected to take photos).

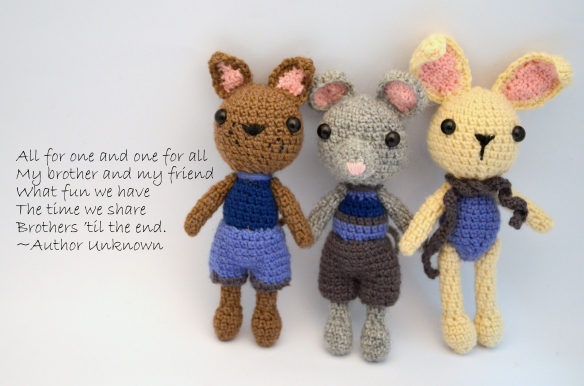
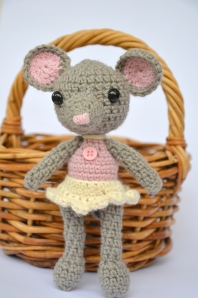
Half way through another blanket for my daughter I got side tracked and started to make cute wittle animals.

DSC_0099

I loved the idea of making a set of brothers and sisters, so incredibly cute.


DSC_0010-002

The love of crochet still consumes me as I am really enjoying being around my family. I may be crocheting whilst they are all watching telly but we are together. With sewing I am shushed away to the corner so they dont hear the whirring of the machine, plus I cant really listen to any television when sewing either.

I have custom listings of either a set of three or just individuals on my etsy store. In these listings you can choose which colour you would like their bodies made from, colour of their clothing, flower no flower, shorts or no short, and more and more options. I really can make to your request, well to some extent. If you are interested please head on over to my etsy store for a look see.

As for which one is my favourite, hmmmmmm. It would have to be the bunny boy or maybe even the mousey girl.

DSC_0052

DSC_0022-001

Sugar-free Granola.

20140513-132318.jpg

I love crunchy granola but I don’t like when the shop bought ones are laden with sugar. I have put together a recipe that is really delicious and depending on what you like you can add different bits and pieces to the main mix.

Main mix:
4 c rolled oats
1 c chopped almonds.
1/2 c coconut oil, melted
4 tbl Stevia ( I use Norbu brand)

After cooking:
1/2 c rice bran or other
1 c 5 seed mix or other
( if adding other ingredients just measure it out to 1 1/2 cups)
1 tbl cinnamon ( adds sweetness)

So melt your oil and mix in the above ingredients from the main mix section. Stir until combined. Place onto baking trays, the thicker the layer the longer it will take. Them into a preheated oven of 180 degrees C. This will take between 25-45 mins, all depending on thickness of oat layer. Don’t walk away and leave, this one requires you to stay close otherwise you will have burnt granola.

Turn and stir your oat main mix every 5 mins until it is nice and golden.

When ready, pour into a bowl. Then add the remaining ingredients. When cooled, place into a sealed container.

Makes around 6-7 cups of granola.

What!! Not another gluten free banana bread recipe

I know there are loads of Banana bread/loaf recipes out there in cyber world. Lord knows I have tried plenty. So I thought why not chuck another one out there and maybe someone might enjoy it as much as my family and I do .

20140509-124711.jpg

Gluten free, no added sugar Banana bread recipe

1/2 cup coconut cream
1 egg
3 medium mashed old bananas.
3 tbl Stevia ( I use Norbu, only one I have found that doesn’t have that bitter aftertaste)
1 tsp vanilla essence
1 1/4 cup GF plain flour blend
1/2 tsp bicarbonate soda
2 tsp GF baking powder
1/4 cup almond meal
1/4 cup flaxseed meal

Mix all the wet ingredients together. Sift together flour, soda and powder. Stir into wet mix, add remaining ingredients.
Pour into a loaf tin (13x23cm),bake 180 degrees C for approx 25-30mins or until golden brown ontop.

I always have lunch boxes in mind when I bake as well as how to make it as healthiest as possible. This one is a winner and so easy to make.

Enjoy!!!

Cheesy Sweet Potato and Bacon Gluten Free Loaf

Such a long title but only one word to describe, YUM.

This loaf doesn’t last long in my house which explains the lack of nice photos taken. It is used for the kids lunch boxes and as for a snack for me in the day. It has such a lovely texture that one wouldn’t even guess that it was gluten free.

20140506-110425.jpg

Enough natter, where is this recipe ( if your like me I just scroll down to the end of post to get the recipe, rarely do I read the waffle above it).

Cheesy Sweet Potato Bacon Gluten Free Loaf

1/4 cup melted coconut oil
2 eggs
1/2 cup plain yoghurt
3/4 c cooked mashed sweet potato
1 cup grated cheese
2 rashers bacon diced
2tsp Baking powder GF
1/2tsp Bi Carb Soda
1 1/4 cup gluten free plain flour blend (FreeFrom Gluten range)
1/4 cup almond meal
Pinch of salt
Pinch of garlic powder (optional)

Mix together the oil, eggs, yoghurt and mash. Combine. Sift in the bicarb, baking powder and flour. Add the almond meal, salt and garlic. Just combine. Finish by adding the cheese and bacon.

The mixture is quite thick. Place into a loaf tin. Bake for approx 25-30 mins at 180 degrees Celsius.

When cooked, turn out onto drying rack and see if you can wait till it cools before you want to eat it.

Finish by lathering with butter. My motto: everything tastes better with butter.

Happy Baking Peoples
I am off to taste my Magic Bean Cake.

Bec x

NEW PATTERN!! Mellebug Reversible and Adjustable Hat

Its only taken me two weeks to blog about the release of my hats but it has finally happened. Truth be told my pc is on its way out and is sooooooo slow to work with that I dread going on it. If I sell enough patterns who knows I may just get that much needed upgrade for my computer.

1656001_813609398655636_2009661087_n

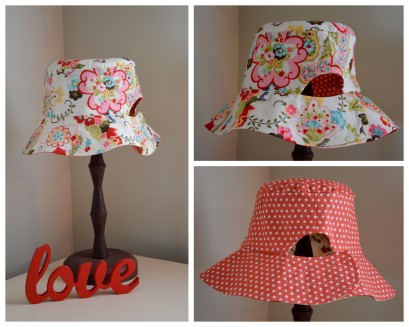
Okay, Lets get down to details (reading about my computer woes is not that all interesting). Hats!! Yes Hats. If you have been following my little journey through this blog you would have noticed that I make reversible/adjustable hats. I look back and notice that I have been selling them for over 4 years now, quite a feat for me. I would ideally like to continue making them but alas as my babies are growing up I have to return to work. SO! I am handing the reins over to YOU!!. I have loving drafted the patterns of all the sizes I have, photographed the process and written detailed instructions. As with all of my patterns you are more than welcome to sell your creations on a small scale as long as you credit ‘Pattern by Mellebug’ in your listings. This was my third baby and I was very reluctant to sell the pattern I drafted and created many years ago. I dont believe there is any other handmade pattern out there that is similar in design.

DSC_0013-007 

The patterns are available in my etsy store (links on side of page). You can purchase the sizes individually at $10 AUD each or you can purchase all four for $35 AUD. The prices of these patterns are due to the nature of this design, its selling capacity and the hard work that went into creating it.

Sizes available are:

small, medium, large and adult.

mellebug113-4

The instructions come with over 50 photographs to help you along the way and thorough instructions. I believe a person with a little sewing know how can tackle this pattern.

Please head over to my etsy store for more info.

Happy sewing peoples!!

Bec (thats me below sporting an adults version)

Copy of DSCF7514


Make your own bag tag tutorial.

This is a fun little project for your kids to do along with your help. There are a few materials required but once you have them you make make more bag tags for years to come. It is also a quick project, well that depends on how meticulous they are in their drawings. My daughter took forever.

20140126-130730.jpg

Materials required:
– plain cotton and pattern for the reverse.
– felt
– fabric markers
– pinking shears
– eyelets and tool for insertion
– circle clip to hang to bag ( the name eludes me at the moment)

Okay let’s get started.
1. Cut out your plain fabric shape. You chose how big or what shape you want ( or should I say your child).
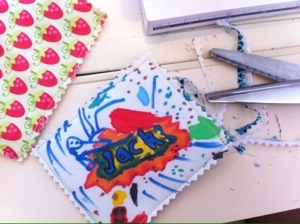
2. Give them the fabric markers and let them design their little hearts out. I taped the fabric to the table to stop it from slipping.

20140126-131436.jpg
3. When finished iron fix the design. Follow instructions from your fabric makers.

20140126-131702.jpg
4. Cut out the patterned fabric and felt to the same size as your design piece. The felt will go in the middle to give it structure.
5. Using the sewing machine, sew the three layers together. A quarter inch from the edge. Use the pinking shears to clip the edge. This will prevent fraying.

20140126-132008.jpg
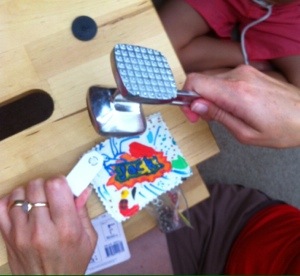
6. Using the instructions from your eyelet packet insert the eyelet into one corner. I broke my tool ages ago so I have to hammer upside down but it’s really simple to do.

20140126-132151.jpg

6. Last job to do is to put on the circle clip and attach to bag. The name will come to me eventually but for now all I can tell you is that I got it from a stationary shop for 20c.

20140126-132404.jpg
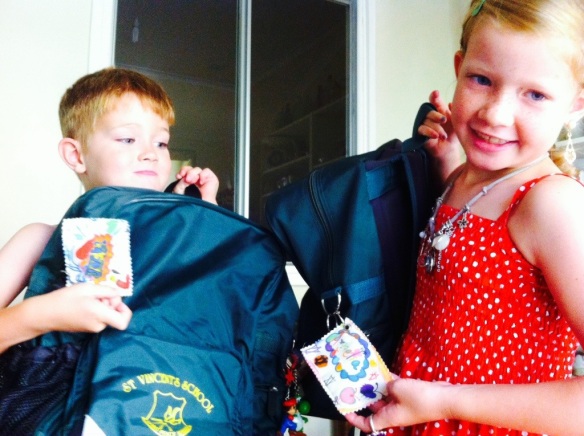
Voila, two happy campers.
Unique and personal name tags that helps them (my two) find their bags in a sea if green.
Happy crafting!!

20140126-133130.jpg