Make your own bag tag tutorial.

This is a fun little project for your kids to do along with your help. There are a few materials required but once you have them you make make more bag tags for years to come. It is also a quick project, well that depends on how meticulous they are in their drawings. My daughter took forever.

20140126-130730.jpg

Materials required:
– plain cotton and pattern for the reverse.
– felt
– fabric markers
– pinking shears
– eyelets and tool for insertion
– circle clip to hang to bag ( the name eludes me at the moment)

Okay let’s get started.
1. Cut out your plain fabric shape. You chose how big or what shape you want ( or should I say your child).
2. Give them the fabric markers and let them design their little hearts out. I taped the fabric to the table to stop it from slipping.

20140126-131436.jpg
3. When finished iron fix the design. Follow instructions from your fabric makers.

20140126-131702.jpg
4. Cut out the patterned fabric and felt to the same size as your design piece. The felt will go in the middle to give it structure.
5. Using the sewing machine, sew the three layers together. A quarter inch from the edge. Use the pinking shears to clip the edge. This will prevent fraying.
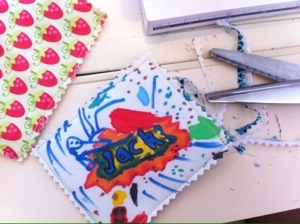
20140126-132008.jpg
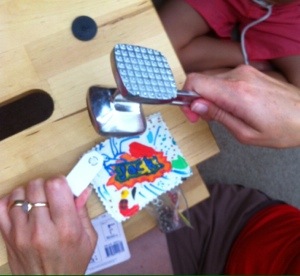
6. Using the instructions from your eyelet packet insert the eyelet into one corner. I broke my tool ages ago so I have to hammer upside down but it’s really simple to do.

20140126-132151.jpg

6. Last job to do is to put on the circle clip and attach to bag. The name will come to me eventually but for now all I can tell you is that I got it from a stationary shop for 20c.
20140126-132404.jpg
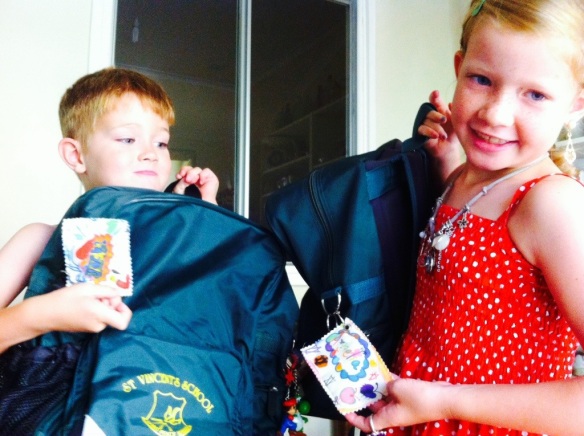
Voila, two happy campers.
Unique and personal name tags that helps them (my two) find their bags in a sea if green.
Happy crafting!!

20140126-133130.jpg

Tea Towel Tutorial with Mitred Corners

With my need to stencil as many things as possible I decided I would make personalised tea towel for the teachers this year. I asked the kids what’s one word that describes your teacher and we will stencil it onto a tea towel. Perfect!
Initially I was looking into purchasing pre-made blank tea towels but discovered that they are quite pricey. Thus a trip to spotlight was needed to get some linen/cotton blend fabric. I do love linen tea towels but at $27m I compromised with blended. It worked about each tea towel cost me $2.50.

20131204-125132.jpg

So I just bought 55cm off the bolt so it works out roughly 2x (50×65) when finished.
Linen and linen blend is not the easiest to work with as it shifts and stretches but who cares if the tea towel isn’t perfectly square in the end, to me that’s what handmade is all about.

So cut out your rectangle, press.
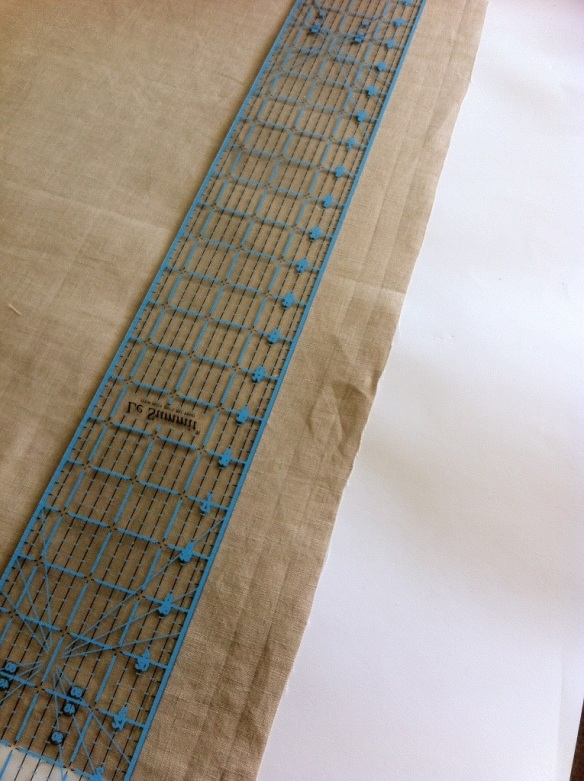
I then drew 2 x 1/4 inch lines on each side.

20131204-130100.jpg
Starting on one side bring the raw edge to the second line, press.

20131205-132512.jpg
Then fold over again so it’s the same width as the first fold.

20131205-132633.jpg
Complete this for all four sides. Make sure to unfold a folded corner to complete each edge. The fold lines run the entire lengths.
Okay, grab one corner and have it so the good side is facing up.

20131205-133015.jpg
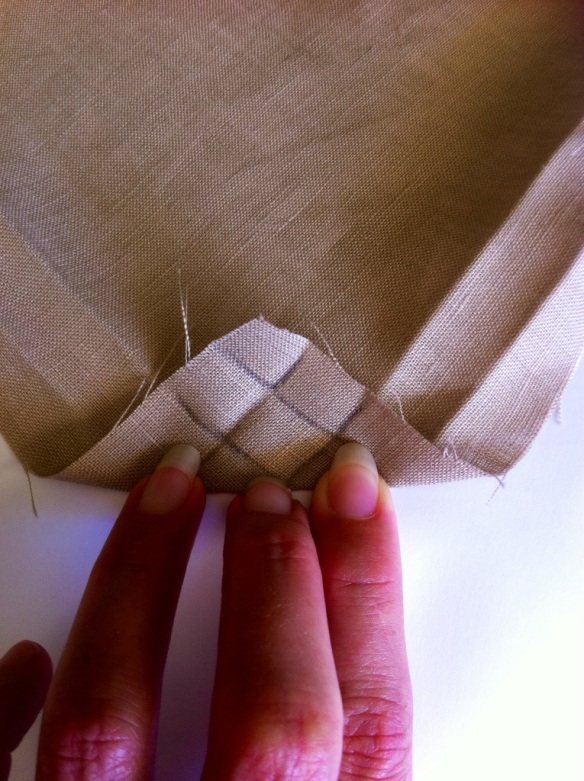
Now fold the corner back so that the second lines meet.

20131205-133123.jpg
Press. This line is the guide you use to sew the corner.
Still with right side facing up fold that corner so that the last folded line meet, see pic.

20131205-133335.jpg
Place a pin along the first line, this is where you sew too.

20131205-133439.jpg
Trim off the excess fabric from that corner. Now turn your seam inside out.

20131205-133630.jpg
Fold the unsewn section of the corner under and pin. Do this for both sides. Repeat for all four corners.
Sew around the entire tea towel along the edge of the fold.

20131205-134039.jpg

Voila you have a tea towel. Easy peasy and done within 20 mins. Use my stencil tutorial if you want to contact stencil or embellish as you wish.

20131205-134259.jpgw

Contact stencil tutorial

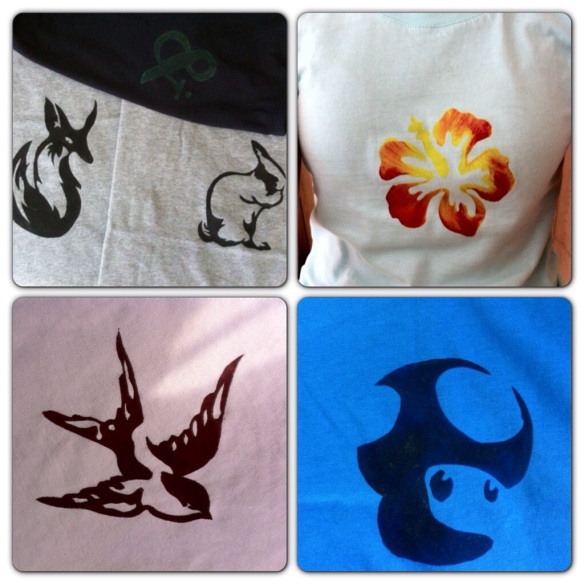
Not sure why I didn’t twig onto this craft years ago but I am sure making up for it now. No plain shirt is left in my house and I am about to print shirts for all my family this christmas.
Right let’s get started.
Tools:
Shirt or fabric
Contact paper ( clear or coloured)
Fabric paint (I use permaset)
Brush
Cutting device, blade
Cutting mat

Print out your design onto paper, here is the link to the bunny I am using. The design needs to apply to stencilling and less detail works better with this method. Cut out your contact so that there is a generous amount around the design.

20131201-162719.jpg
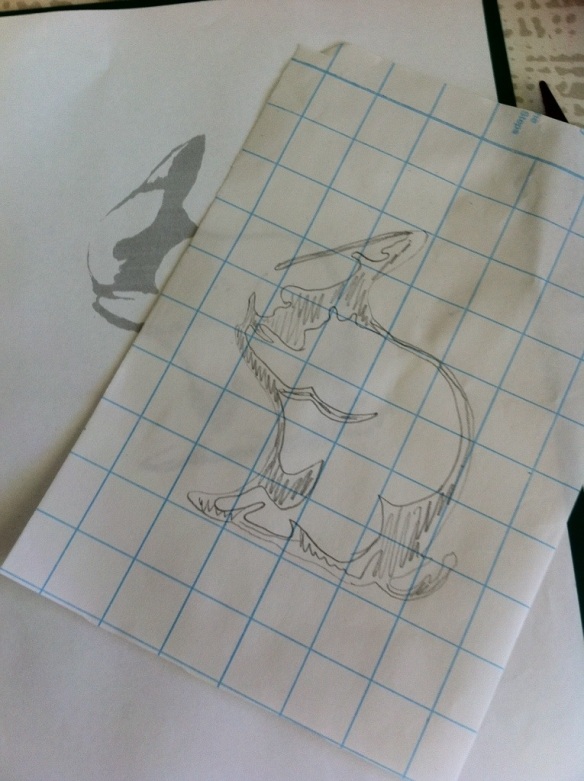
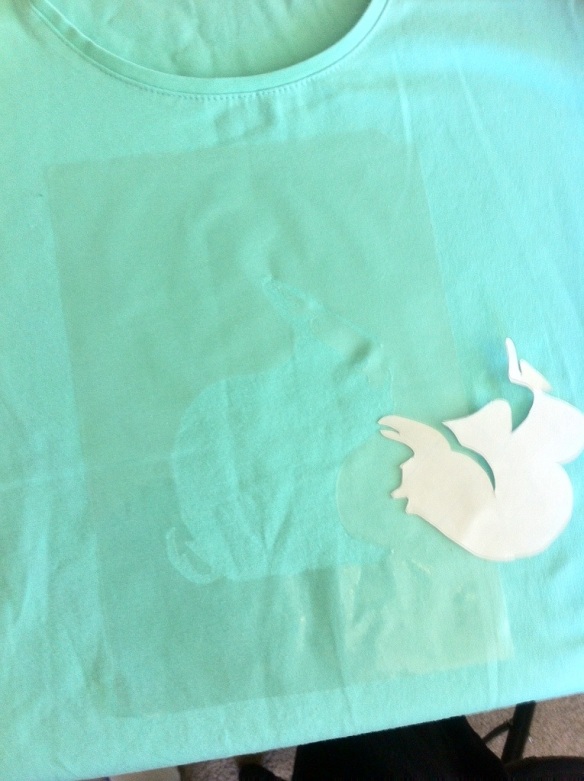
Place the contact over your design, paper side up. Trace your design onto the contact. The shaded areas are what I will be cutting out.

20131201-162937.jpg
Using a blade and a mat, cut out the shaded areas of your design. Easier to start in the middle and work your way out.

20131201-163142.jpg
This design has two parts, the outer silhouette and the middle part. Discard the shaded cut out part.
Prepare your shirt and line up where you want the design to go. Peel off the paper from the outer silhouette and stick into place on shirt. Rearrange if needed till it’s right.

20131201-163635.jpg
Take the middle part of the design and stick in place.

20131201-163833.jpg
Before you begin to paint put a piece of paper under the print so that the paint doesn’t seep through to the other side.
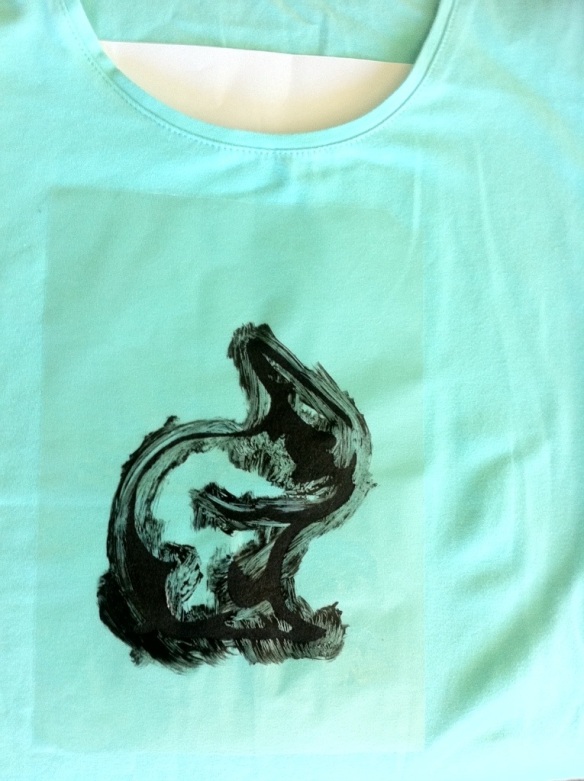
Paint away and leave to dry.

20131201-164027.jpg
When dry, peel off the contact. If there are any blurry edges you can just touch up with fine paint brush.
For the fabric paint I am using I have to heat set it. Check your paint for instructions.
You can use your stencil a few times until it looses it’s stick.

20131201-164821.jpg
Other little bits to add:
* Don’t make design to complicated, it will stick to each other terribly when trying to position. Simple works best here.
* If you get paint on your shirt where it shouldn’t be, leave it to dry and then wipe off. You will only smear it when wet and make a bigger mess.
* coloured contact may be better particularly if you are using lots of cut outs in your design.
* Sharp blades work better, a given.
Hmmm what else………
Have FUN!!!!!

20131201-165511.jpg

Chain of Crocheted Doilies tutorial

20131128-162007.jpg

I initially made this sweet chain of crocheted doilies to be used as Christmas decorations, but frankly I think you could enjoy these all round.

So simple yet so much effect.
– small crochet doilie, cut (cut from tableclothes) or whole. I got mine off eBay.
– PVA glue
– 4ply wool or string

To start with all you have to do is mix your PVA glue (approx 2tbl) with water (4tbl). Then dunk your doilies until they soak up the liquid. Lay them out onto a plastic surface to dry.

20131128-135506.jpg
They dry hard and will not fray when using cut doilies.
To finish I finger knitted a chain using 4 ply bamboo. I incorporated each doilie 10cm apart by just sticking the wool through a hole of the doilie during a stitch.
Here is an easy finger knitting tutorial made by Imogen’sAngels.

20131128-140151.jpg
Drape on your Christmas tree, the wall, book shelf, anywhere you want some vintage sweetness.

20131128-162327.jpg

Fingerless Gloves Pattern/Tutorial

I like to knit but my skills are limited and it doesnt matter how hard I try at extending them I draw blank when I read the pattern. Give me pictures and I would work it out but put it in abbreviated long sentences and I get lost, completely. So I stick to straight lines and the occasional increase/decrease but it stops there.

Now when looking for gloves for the wee man I couldnt find anything. He says ” No worries mum, you can knit me some.” errrr… no son I cant (no such thing as cant I hear hubby in the background say). So off I go for a search. I came up with nothing for tutorials/free patterns that I could figure out, but in looking at a pic I figured I could make something similar.

These gloves are easy peasy lemon squeezy. A great pattern for any knitter starting out.

Fingerless Gloves Pattern

** Size 7 needles or 4mm

You could win the gloves made for the pattern: head here!!!

Orphan/ Apron Dress Costume Tutorial

It has certainly been the month for making costumes and I can foresee that I will be putting my hand to many more in the future. This latest costume has been made for my daughters dance performance at the end of the year (talk about being organised). After coming up with zilch tutorials I decided to make one up of my own so as always I am not a pattern maker and I try to explain things as easy as I can but if you have any queries please leave a message below and I may be able help out.

The pattern provided is for approx 6-8 year old (depending on chest size) but you can increase or decrease as needed (info in pdf file).

Sewing level: easy to moderate

 Orphan/Apron Dress Costume Tutorial


Easy Mermaid Costume Tutorial

I am not generally one for leaving things to the last moment but on this occasion I was making this mermaid costume a day before the party. What saved me the most was the fact that the fabric didnt fray, no hemming required and I used an old t-shirt, a half made top. So it really only took a small amount of time to make and then glue on some embellishments.

My daughters response the next day “Awesome, Awesome, Awesome”. Thumbs up.

If I hadnt left it to the last minute I would have put together a better tutorial but it is pretty simple.

So first off the top.

Get an old shirt and unpick a 4 inch (10cm) gap right underneath the armpits on both sides. With your chosen mermaid fabric (I think mine was lycra, non-fray) cut a rectangle with a width of 10cm and the length of the tshirt plus 1/2 inch (1.5cm) for seam allowances on both sides. In the center of the rectangle I ruched it by using a gathering stitch and pulling the thread till it bunches up. Turning the shirt inside out I place the rectangle inside and pinned to where the gaps are (make sure the sparkly side is facing the right way). Sew the gaps closed. Turn right way out and then I sewed the ruched section to the shirt and glued on a fancy button.

That part done!!!

Next the skirt.

I just used the width of the fabric off the roll (112cm or 44inches) folded in half and the lenth of my daughters legs to her ankles plus the elastic casing (2in/5cm), sew down the open edge. Then I measured the lenth to where I want the shortest part of the skirt to sit plus 2in 5cm for the elastic casing and cut out the arc (on the folded edge) to a width to where I will place the tail fin (11in/ 29cm).

Fold over the casing at the top for the elastic and sew down, leaving a gap to insert the elastic. Measure your childs waist and take 1 inch off for the elastic measurement, insert in the skirt, check that it fits right and then sew together.

The Fin.

With the width of the bottom of the skirt draw out desired fin shape (x2) in the lyrca and 1 with either felt or fleece again no fraying. Sandwich the felt inbetween the lyrca with the good sides of the lycra facing out and pop in some ribbon as the holder (tip: if right handed put the ribbon on the right side of the tail and then the same if left handed. It has to do with how the skirt hangs when on the arm. This tip I discovered after I made it). Pin three layers together and zig zag stitch them together. Pin the fin to the skirt (watch where the ribbon goes) and sew together. I top stitched that seam so it sat flat at the back.

To finish I put a button at the top near the elastic so when they have had enough of the skirt hanging off their arm they loop it to the button (up there for thinking hey!!)

Voila!

Now using the scraps and a bit of tulle you can make a lovely head piece to go with it.

I hope this was easy enough to follow. Got any questions dont hesitate to ask.

Bec

xx

Fabric Flower.

With one day to go to a friend’s wedding I thought I should perhaps put a little colour into my outfit. I liked the idea of putting something in my hair but where to start. Google images. It is the place I go to for inspiration on a desired project. I suppose it is a bit like pinterest but I have yet to delve into yet another cyber outlet that can otherwise consume more of my time.

Anyways in my trawling through the photos I came across this tutorial on a flower collar by Katiedid. Very cute indeed.

I turned this great idea into a hair clip.

I ended up using light weight jersey, put a circle of felt on the reverse with a hair clip to attach. I am also thinking of adding a brooch pin. 

I am really pleased with how it turned out. As I had left it to the last minute to make I needed to make it right first time. In the end the wedding was beautiful and I wish the happy couple all the best in the future.


Easter tutorials

Only three weeks to go before easter. Time goes way to quick. I have yet to start organising the chocolates and decorations.

Here is some tutorial inspiration I found. Click on the links.

1. Quick Sock bunny (gotta love the quick part, and too cute)

2. Fabric eggs.

3.  Garland

4. Embroidery Easter eggs

DIY Easter Eggs

5. Carrots 

6. One for the kids from I love crafts: The chicken or egg

7. Egg tree