NEW PATTERN!! Mellebug Reversible and Adjustable Hat

Its only taken me two weeks to blog about the release of my hats but it has finally happened. Truth be told my pc is on its way out and is sooooooo slow to work with that I dread going on it. If I sell enough patterns who knows I may just get that much needed upgrade for my computer.

1656001_813609398655636_2009661087_n

Okay, Lets get down to details (reading about my computer woes is not that all interesting). Hats!! Yes Hats. If you have been following my little journey through this blog you would have noticed that I make reversible/adjustable hats. I look back and notice that I have been selling them for over 4 years now, quite a feat for me. I would ideally like to continue making them but alas as my babies are growing up I have to return to work. SO! I am handing the reins over to YOU!!. I have loving drafted the patterns of all the sizes I have, photographed the process and written detailed instructions. As with all of my patterns you are more than welcome to sell your creations on a small scale as long as you credit ‘Pattern by Mellebug’ in your listings. This was my third baby and I was very reluctant to sell the pattern I drafted and created many years ago. I dont believe there is any other handmade pattern out there that is similar in design.

DSC_0013-007 

The patterns are available in my etsy store (links on side of page). You can purchase the sizes individually at $10 AUD each or you can purchase all four for $35 AUD. The prices of these patterns are due to the nature of this design, its selling capacity and the hard work that went into creating it.

Sizes available are:

small, medium, large and adult.

mellebug113-4

The instructions come with over 50 photographs to help you along the way and thorough instructions. I believe a person with a little sewing know how can tackle this pattern.

Please head over to my etsy store for more info.

Happy sewing peoples!!

Bec (thats me below sporting an adults version)
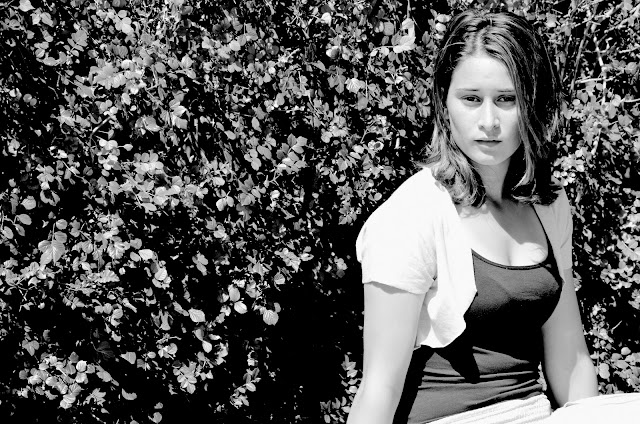
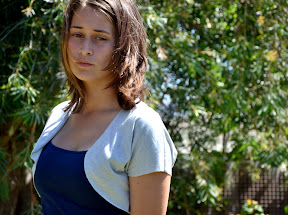
Copy of DSCF7514


New PATTERNS for Mellebug

It has been a little long inbetween blog posts but that is life at the moment. There is only so much time I will spend on the computer these days and unfortunately maintaining the blog is at the bottom of the list.

This year has been full of designing and creating patterns to add to my etsy store. This has been a fun change to what I was doing. With the success of the Wristlet Clutch I had to continue on with clutch theme. This lead to the Deco Clutch Pattern.

I just love the pleat detail and the scalloping at the front. Finish it off with a funky vintage button and its a perfect accessory to take out.

Then came the Haru Clutch. The biggest of the clutch patterns I have on offer with a boxed in bottom. It also has a pleated detail on the front and back and the little wristlet to help carry it.

To mix it up a little and the want to use some gorgeous drill out at the moment I  had a go at making a funky little handbag. The Soho Handbag Pattern was born.

This bag fits all your daily essentials, even my large glass case. The pretty detail of bias tape on the front makes into something unique and funky.

My little miss saw the bags I was making and asked ever so politely “I WANT ONE TOOOOO”. I thought that this would actually be a great combination to offer, a mummy and daughter bag pattern oh and the fact that I like making things for my children too (LOL).

Little Miss Soho Handbag was created. This one is a little different to the adult version as it is reversible so in fact they get two bags in one. This pattern is available as a two in one pattern deal for only $8 AUD.

All the patterns that I offer are full of photographs (most over 50) and detailed instructions to help the sewer along the way. This makes them perfect projects for beginner sewers. For more details on dimensions and other photos please swing by my etsy store for a look see. www.etsy.com/shop/mellebug

Whats in store next?? I havent figured that one out yet. I may actually start the process of turning my reversible/adjustable hats into a PDF version for you all to make your own. Hmmm decisions.

See you in the next 6mths with an update.

Ciao

Rebecca x

Wristlet Clutch Pattern Release

So there are a few things that I am terrible at, one is not maintaining this blog and the second would have to be ironing. Who else is not an ironer?

Anyhoo! Over the last 5 months I really have been sewing up hats for the summer season, so many I think I lost count. This would be my third season of making hats now and I am really proud of how far I have come. I also added to my list of selling and took the plunge and purchased a stack of these Measuring Tape Bangles which you can purchase at my ebay store

Now we are in 2013 and I am taking a new direction with my Mellebug makings. I have decided to focus on some pattern making whilst I return to the classroom to do some relief work. My little man is entering kindy this year so as Bob Dylan says “times they are a changing”.

So here is my first pattern, newly listed in my etsy store last night.

A cute little accessory that can be made in just a couple of hours. The pattern is easy to follow with pictures to help you along the way. You can make it out of colourful quilting cotton or luxurious silk. The pattern is only $5 AUD and you can purchase it at me etsy store.

Wristlet Clutch

 My next project is to turn my Dinosaur Costume into a PDF pattern, so stay tuned.

Fingerless Gloves Pattern/Tutorial

I like to knit but my skills are limited and it doesnt matter how hard I try at extending them I draw blank when I read the pattern. Give me pictures and I would work it out but put it in abbreviated long sentences and I get lost, completely. So I stick to straight lines and the occasional increase/decrease but it stops there.

Now when looking for gloves for the wee man I couldnt find anything. He says ” No worries mum, you can knit me some.” errrr… no son I cant (no such thing as cant I hear hubby in the background say). So off I go for a search. I came up with nothing for tutorials/free patterns that I could figure out, but in looking at a pic I figured I could make something similar.

These gloves are easy peasy lemon squeezy. A great pattern for any knitter starting out.

Fingerless Gloves Pattern

** Size 7 needles or 4mm

You could win the gloves made for the pattern: head here!!!

Super quick Bolero Tutorial.

I love love this super cute Bolero that gives you that little bit extra over the shoulders and also giving you funky layered look.

Once you draw up the pattern I swear it takes only 5 mins to sew up, thats if you are using a jersey stretch material that doesnt require hemming (always a bonus)

Here is my beautiful niece modelling the bolero.

I only bought 1/2m to make this but liked it so much that I went back and bought more. Perhaps great christmas presents for the ladies in your life.


So where is this pattern I here. Well after scrolling through endless tutorial I found it at Modest Prom. They show you how to draft up the pattern using boxes making it easy enough for even the novice to give it a go. It is well worth taking the time to draw it up as you will be asked by your friends to make them one as well.

Cute, Cute, Cute. What can I say. A must make this summer.

Sew easy…

I am in the swing of making dresses for my Mellebug, with the completion of dress number 2 from the pattern Butterick B4176 “fast and easy”.

I found Amelia rummaging through my pattern box and she declared that this is the next dress to be made, pointing to the pink (of course). She we headed off to the fabric store for her to choose which fabric she wanted. After a few cringes at some ghastly fabric to my suprise she liked one with strawberries on it. Whilst waiting at the checkout I was looking through the remnants bin and found two meters of pink gingham at $1 a metre, bargain, thats what I am going to get.

So with cheap fabric, a secound hand pattern, buttons from the stash and I made my own bias binding it was set to be a super cheap dress. The pattern was as it states “fast and easy”, the only complaint is that it needs to be streamlined as its a bit balloned at the bottom. I also loved learning how to make a button loop, you learn something new everyday with sewing. I found this tutorial that has great pictures and is sew simple. Will definantly be doing that again.

Button Loop

Another success with her liking the dress. I will be going back to get the strawberry fabric to make another one and lucky for me for not buying it that day as tommorow it goes on sale, yeha!. I think next in line will be something for the wee man. Was thinking I would make a tutorial on making upcycled t-shirt pants but I have to get my hands on a cheap tee.

Till next time….

Pretty party dress.

I havent made a great deal of clothing for Miss A over the years as she never seemed to like my fabric choice or had so many hand-me-downs that I didnt bother.  Now with less in the cupboard and with her approval of fabric I have started to make more.

This pattern was bought over a year ago now and has been sitting there just wanting to be made. With impending birthday parties coming up and a lull in Mellebug makings I decided to give it a go.

A pretty simple pattern to make which is good because sometimes I find patterns can be sooo confusing. They expect you to understand a complex step with one crappy picture and a few lines. It also looks like its a wrap dress but infact it is fixed at the front and has a zip at the back. Wouldnt mind altering it slightly so that it is a wrap, not fussed on putting in zips.

 So glad I made it as she looooves it. The only problem is that it turned out a wee short for her long legs, she said ” nevermind mum, I will wear it with leggings”. I could unpick the hem and add a length of fabric used for the sash but instead I will make another one just because.

Didnt get a chance to photograph it on its own. She divided on it first thing this morning and wont take it off.

Cute, Cute, Cute..

Book Holder For Edie

My sweet little niece is having a birthday at the end of this month and like always I try and make all the children in my family a hand made present. Thus with a little hint from her mum I came up with this very handy book holder that hangs of the frame of a bed.

From Sewing 2

It is a super easy project that I completed during a couple of hours Jack was asleep. It was so infact easy that I had to make another for my kids. Now I think why on earth did I not make one earlier seeing as though our books are always left either on the floor or on the spare bed.

From Sewing 2

I thought I would share with you quickly how I made them.

  1. Cut out two contrasting fabrics 31 inch x 26 inch.
  2. Cut out 4 or more straps 9 inch x 5 inch
  3. If using cotton for both contrasting fabrics you need to iron on medium interfacing to one side.
  4. 4 buttons.

Firstly make the straps by folding them in half (good sides together) and sew one short edge and the long edge. Turn inside out. I also sewed a 1/4 inch band around each strap.

From Sewing 2

With the contrasting fabrics, good sides together, pin along one of 31 inch sides. Sew a 1/2 inch seam. On the opposite side pin the four straps so that they lay on the good sides of the holder (next time I would put a strap in the middle as its where there is alot of pull from the books). Lay the other side over the straps and sew a 1/2 inch seam. When going over each strap I sewed back and forth a few times to add strength.

From Sewing 2

Fold up the bottom 10 inches and pin. Sew along both sides and sew a line in the middle of the caddie. When sewing these I sewed back and forth at the start and at the end of each seam to add extra strength.

From Sewing 2
From Sewing 2

Sew binding onto either side.

From Sewing 2

Sew button holes onto the straps and then the buttons. Easy Peasy…..

From Sewing 2

Patchwork bib tutorial

Here it is, a tutorial to make bibs using patchwork. I think it gives bibs that special something, it certainly makes your little ones stand out were every s/he goes.

I again had fun making this bib (there are other designs on an older post), using gorgeous Japanese fabric suprisingly bought at Spotlight. I have not included a pattern because all you need to do is draw one from a bib that you already have. If you want the particular one I have used just leave a message and I will send one to you.

PATTERN NOW AVAILABLE.

Patchwork Bib Pattern

# Had a little trouble with sizing. You need to add 1/4 inch seam allowance around the bib.

Step 1. Cut out your chosen fabric into strips of different widths.

Step 2. Sew the lengths together until you have well over enough to fit your bib. You need that extra bit because when you start cutting and sewing you end up with a smaller sized fabric.

Step 3. The fun part. Start cutting out the sewn strips using a rotary cutter (much much easier than scissors). I have not long invested in the cutter and mat and I will never look back, magic. Now you can cut lengths of different widths , then cut squares and triangles from these. If you are not confident with cutting on the diagonal just stick with straight lengths and then when you come to putting the pattern onto the sewn up fabric just put it on an angle.

Step 4. Try and piece it back together to form a rectangle.

Step 5. Place the pattern on and cut out. Also cut out another piece of fabric for the back of the bib. I used teri-toweling.

Step 6. Sew the two pieces together, right sides together, 1/4 in seam. Here is where I added my stamp that I put onto ribbon.

Step 7. Turn inside out and stitch the opening closed. At this point you could quilt the two pieces together. Then put a snap (kindly donated by my good friend Amber who invested in the heavy duty snapper, well worth it) or velcro (I’ve heard that it is also referred to as magic tape, hehe). I prefer the snaps because I find that velcro always sticks to my clothes in the wash, annoying plus damaging.

voila finished.

I would absolutely love to see other peoples creations so please send a picky or link.

Hope you have as much fun creating as I did.